howto_ionic client generation
We are going to show you how to generate a CRUD Ionic application from an ETO using CobiGen.
|
Note
|
This is a short introduction to the Ionic generation. For a deeper tutorial including the generation of the backend, we strongly recommend you to follow this document. |
Before starting, make sure you have the following things already installed on your machine:
If CobiGen_Templates are not already downloaded, follow the next steps:
-
Right click on any file in your Eclipse workspace. Select CobiGen → Update Templates… from the context menu and now you are able to start the generation.
-
If you want to adapt the templates, select CobiGen → Adapt Templates… from the menu and you should have the CobiGen_Templates as a new project in your Eclipse’s workspace.
After following those steps correctly, you should have the latest version of the templates ready to use.
We are going to generate the CRUD functions into a sample application. First, clone or download the devon4ng Ionic template in your workspace.
After that, please create a devon4j project and then start implementing the ETO: you can find an example here.
As you can see, TableEto contains 3 attributes: 2 of them are Long and the third one TableState is an enum that you will find
here.
The Ionic generation works fine for any Java primitive attribute (string, float, char, boolean…) and enums. However, if you want to use your own objects, you should
override the toString() method, as explained here.
The attributes explained above will be used for generating a page that shows a list. Each item of that list will show the values of those attributes.
For generating the files:
-
Right click your ETO file and click on CobiGen > Generate as shown on the figure below.

-
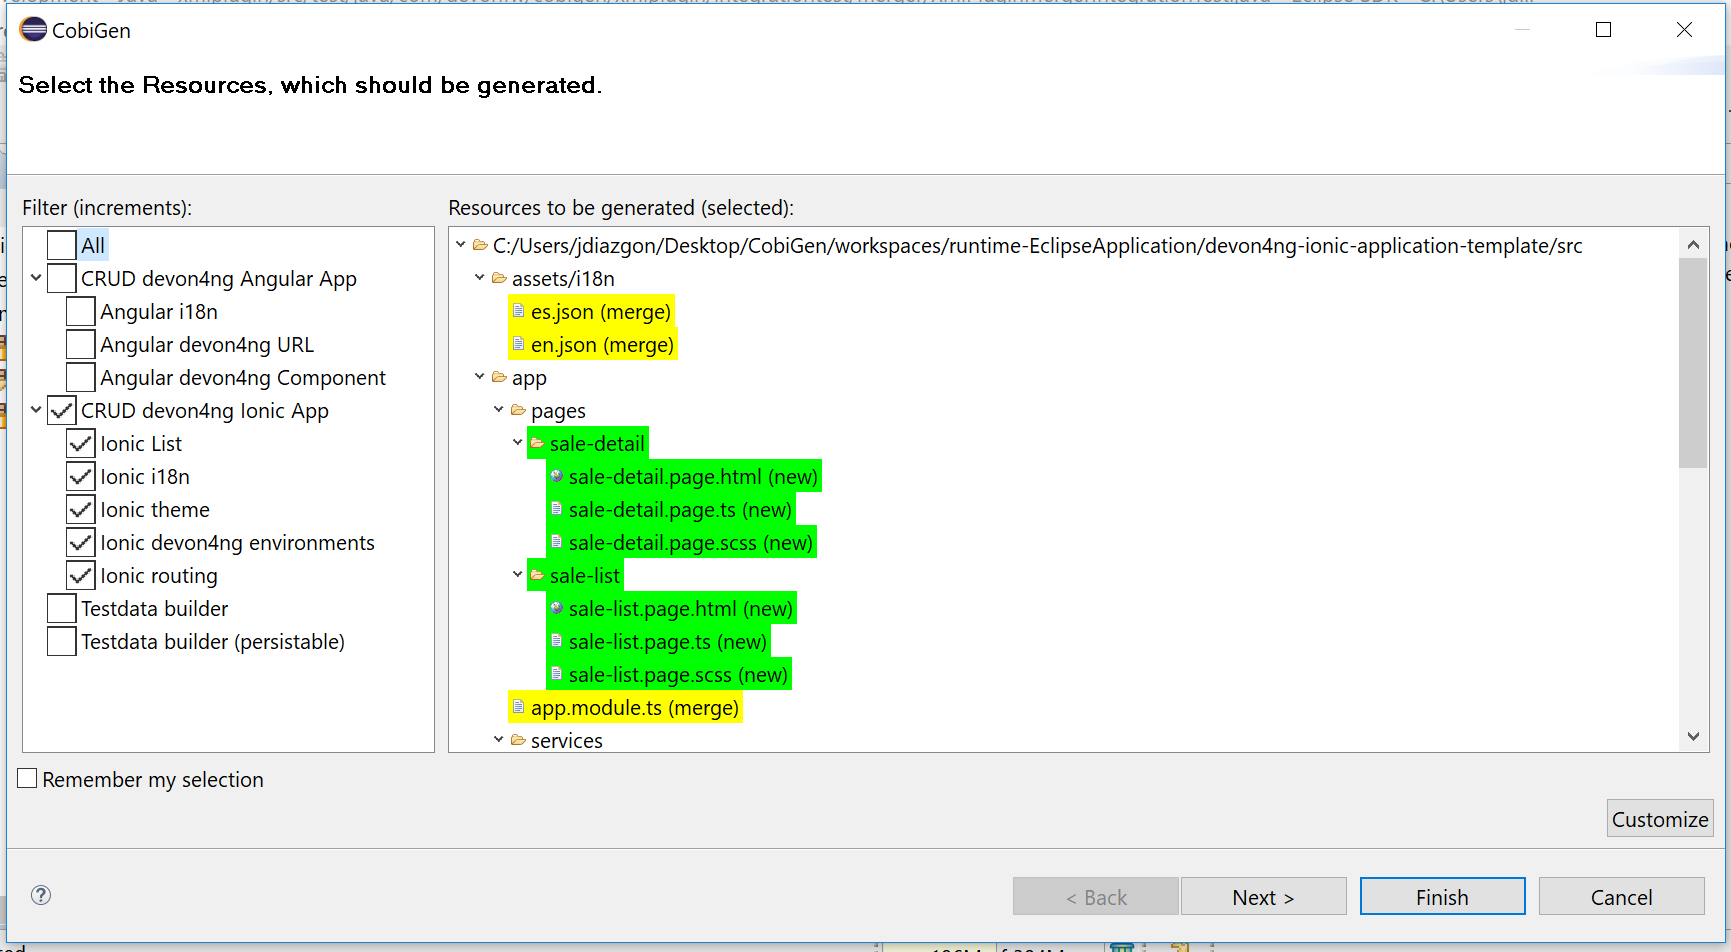
Select the Ionic increments for generating as shown below. Increments group a set of templates for generating different projects.
-
Ionic Listused for generating the page containing the list. -
Ionic devon4ng environmentsis for stating the server path. -
Ionic i18nused for generating the different language translations for the `translationService` (currently English and Spanish). -
Ionic routingadds an app-routing.module.ts file to allow navigation similar to the one available in Angular. -
Ionic themegenerates thevariables.scssfile which contains variables to style the application.
-
|
Note
|
By default, the generated files will be placed inside "devon4ng-ionic-application-template", next to the root of your project’s folder.
See the image below to know where they are generated. For changing the generation path and the name of the application go to CobiGen_Templates/crud_ionic_client_app/cobigen.properties.
|

Now that we have generated the files, lets start testing them:
-
First change the SERVER_URL of your application. For doing that, modify
src/environments/environments.ts, also modifysrc/environments/environments.android.ts(android) andsrc/environments/environments.prod.ts(production) if you want to test in different environments. -
Check that there are no duplicated imports. Sometimes there are duplicated imports in
src/app/app.module.ts. This happens because the merger of CobiGen prefers to duplicate rather than to delete. -
Run
npm installto install all the required dependencies. -
Run
`ionic serveon your console.
After following all these steps your application should start. However, remember that you will need your server to be running for access to the list page.
To run the application in an android emulated device, it is necessary to have Android Studio and Android SDK. After its installation, the following commands have to be run on your console:
-
npx cap init "name-for-the-app (between quotes)" "id-for-the-app (between quotes)" -
ionic build --configuration=android. To use this command, you must add an android build configuration at angular.json
    "build": {
      ...
      "configurations": {
        ...
        "android": {
          "fileReplacements": [
            {
              "replace": "src/environments/environment.ts",
              "with": "src/environments/environment.android.ts"
            }
          ]
        },
      }
    }
-
npx cap add android -
npx cap copy -
npx cap open android
The last steps are done in Android studio: make the project, make the app, build and APK and run in a device.


Disclaimer
If you discover any documentation bugs or would like to request new content, please raise them as an issue or create a pull request. Contributions to this wiki are done through the main repo under the folder documentation.
License

This documentation is licensed under the Creative Commons License (Attribution-NoDerivatives 4.0 International)