Preprocessing Shaders
AMBF's Rendering pipeline has 4 stages as shown here.
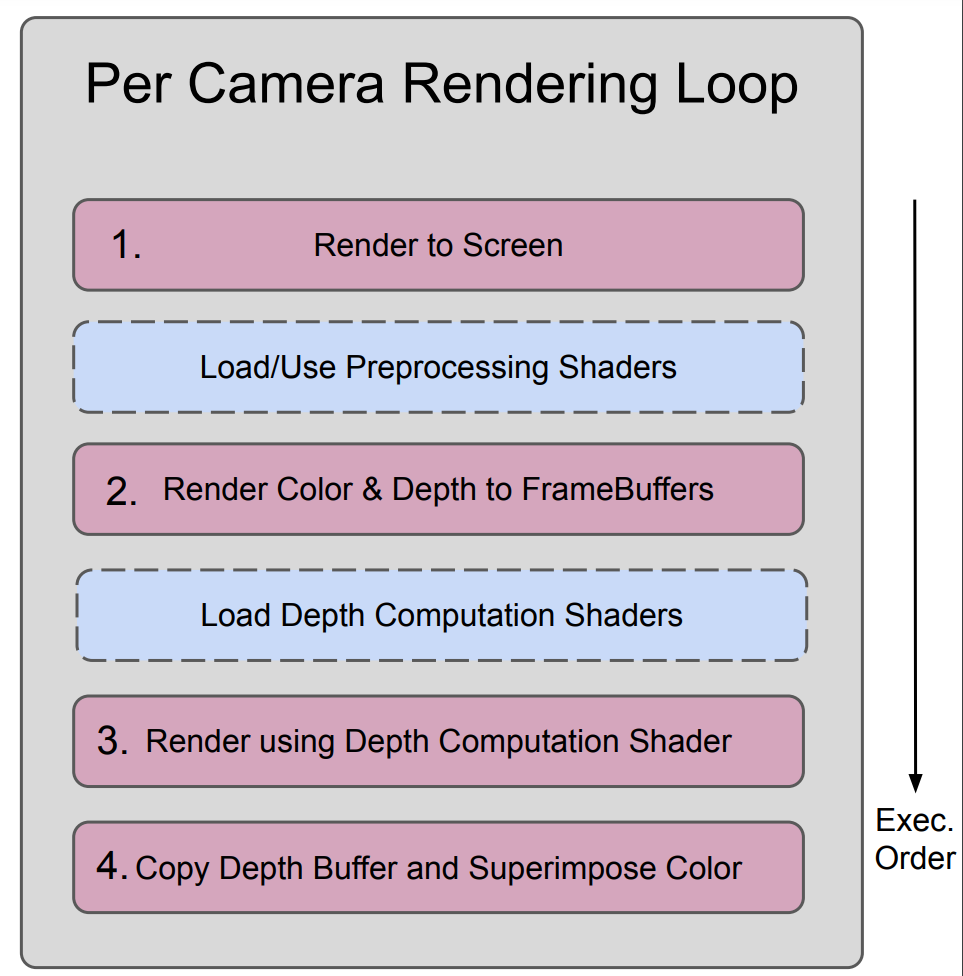
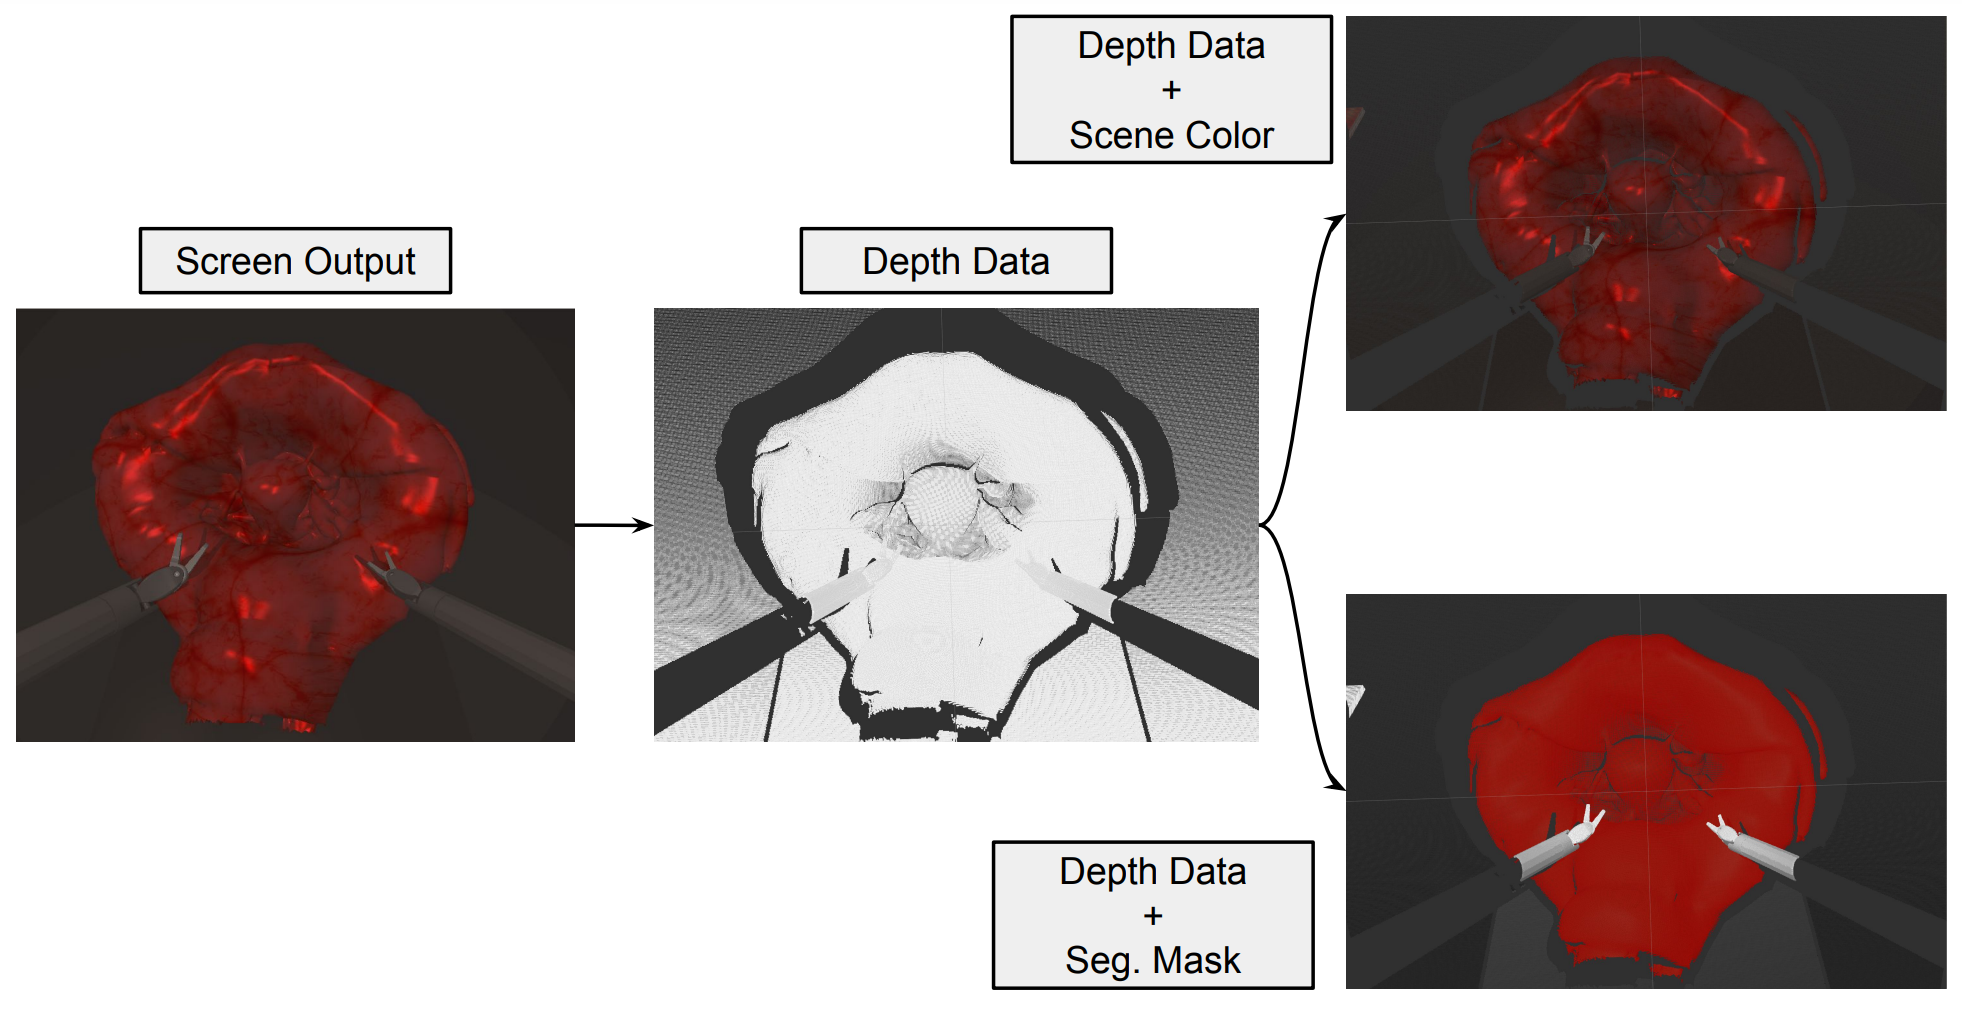
The "preprocessing shaders" can be used to insert (OpenGL) shaders after a camera has rendered to the screen (step 1). These shaders can really contain anything to render the object (mesh). If we simply use the diffuse color of the object to render to the framebuffer, the lighting calculations are ignored and we get an image that resembles a segmented image. There is a catch here though which is that if different objects have exactly the same RGB color, they would be indistinguishable in the segmented image.
Please note that the output resulting from the use of "preprocessing shaders" is not seen on the AMBF window for the camera, but instead via the ROS data of the published Images and/or Depth. These can be enabled via these instructions.
The "preprocessing shaders" can be enabled for any camera by adding the relevant data to its definition. Lets take an example of the following camera definition from the default AMBF world file.
...

camera1:
  namespace: cameras/
  name: default_camera
  location: {x: 4.0, y: 0.0, z: 2.0}
  look at: {x: 0.0, y: 0.0, z: -0.5}
  up: {x: 0.0, y: 0.0, z: 1.0}
  clipping plane: {near: 0.1, far: 10.0}
  field view angle: 0.8
  monitor: 0
  # multipass: True
  publish image: True
  preprocessing shaders: # This enables preprocessing shaders
    path: ../../../ambf_shaders/preprocessing/
    vertex: "shader.vs"
    fragment: "shader.fs"
  # publish image interval: 1 # Publish every nth scene update
  # publish depth: True
  # publish depth noise: {mean: 0.1, std_dev: 0.01, bias: 0.0}
  # publish depth interval: 1 # Publish every nth scene update
  # publish image resolution: {width: 640, height: 480}
  # depth compute shaders:
  #   path: ../../../ambf_shaders/depth
  #   vertex: "shader.vs"
  #   fragment: "shader.fs"

...
Notice the following lines in the camera definition above:
preprocessing shaders:
    path: ../../../ambf_shaders/preprocessing/
    vertex: "shader.vs"
    fragment: "shader.fs"
The "path" field, in this case, is a relative path (with respect to the world.yaml file) which points to the "vertex" (shader.vs) and "fragment" (shader.fs) shaders.
The "vertex" shader is simply a pass-through shader and thus not important. The fragment shader is worth looking at.
varying vec4 vPosition;
varying vec3 vNormal;
varying vec3 vTexCoord;

uniform sampler2DShadow shadowMap;
uniform sampler2D diffuseMap;

void main(void)
{
    vec3 diffuse =  gl_FrontLightProduct[0].diffuse.rgb;
    gl_FragColor = vec4(diffuse, 1.0);
}
The two lines in the main function simply use the "diffuse" color of the object and render it to the framebuffer. With the "publish image" and/or "publish depth" flag set to "true" in the camera definition, the image below shows the difference between using and not using the preprocessing shaders.