|<Previous: Chapter 1 | Next: Chapter 3> |
JavaCV versions of C++ examples from Chapter 2 of the book "OpenCV Computer Vision Applications Programming Cookbook" titled "Manipulating the Pixels"
The second chapter of the OpenCV Cookbook deals with manipulating individual pixels in images. The OpenCV library provides many algorithms to operate on images. However, you may have need to access and manipulate individual pixels to create custom algorithms.
The Cookbook describes an approach that is specific to using the OpenCV from C++.
It is not applicable to other languages, not even C.
Here, we present an equivalent way of accessing individual pixels in the image, represented as Mat object, using JavaCV tools, in particular using an Indexer.
An Indexer helps to locate (index) and access pixels within a Mat object. Depending on a type of an image, individual pixels in an image can be represented in different ways, for instance, they can be bytes, integers, doubles. There are specialized indexers for each of those image types, for instance, ByteIndexer, IntIndexer, DoubleIndexer.
You can also index (access) pixels in an image in different ways:
- by specifying
(x,y)or(column, raw)coordinates, for use with gray level images, for instanceput(x, y, value), - by specifying
(x,y,channel)or(column, raw, channel)for multi-channel images, for instance, color images, for instanceput(x, y, channel, value), - by directly indexing stored values by single one dimensional coordinate
(i), assuming that an image is one long collection of pixels, for instanceput(i, value), works with any image.
The first two approaches are straightforward. To iterate over pixels and channel values you need know number of columns (Mat.cols), number of rows (Mat.rows), and number of channels (Mat.channels).
The third approach, directly indexing stored values, is used in the examples below. The key thing you need to remember is that pixel values is stored row by row. For instance, if you need to compute index of a pixel in a specific column and row, you will multiply the row index by the number of columns (Mat.cols) and add column index:
val index = (row * image.cols) + column
val v = image.get(index)
This works well for gray-level images. For color images, and multichannel images in general, you also need to take into account which channel value you are accessing. Pixel values for each channel are stored next to each other, so to compute offset into the Mat to extract a value of (row, column, channel) you use the following:
val index = (row * image.cols) + column
val offset = index * image.channels + channel
val v = image.get(offset)In the Ex1Salt example we add a 'salt' noise to the image. Only a few randomly selected pixels are modified. To determine which pixel will have noise added, we generate random numbers in a range 0 to number of pixels minus one. Pixel location, were to add noise, is create by randomly generating x and y coordinates. To facilitate access to location (x. y) within an image we use an indexer:
// We have an 8-bit grey lavel image (byte image) representead as `Mat`
val image : Mat = ...

val nbChannels = image.channels
// Random number generator
val random = new Random()
// Get access to image data
val indexer = image.createIndexer().asInstanceOf[UByteIndexer]

// Place `n` grains at random locations
for (i <- 1 to n) {
  // Create random index of a pixel
  val row = random.nextInt(image.rows)
  val col = random.nextInt(image.cols)
  // Set it to white by setting each of the channels to max (255)
  for (i <- 0 until nbChannels) {
    indexer.put(row, col, i, 255.toByte)
  }
}
See example Ex1Salt for details.
Here are the input image and the output image with added salt noise:

This example is reducing number of color in an image using a side effect of integer division. An integer divided by an integer is an integer, rather than a floating point number, the fractional part that may result from division is discarded. The integer division in C++ works the same in Java and Scala, though in other languages it may work differently.
Assume that v is a current integer value of a color, in the range 0 to 255, and that div is an integer determining color reduction. For instance, if div=4 the number of color components in each channel will be reduced from 256 to 256/div = 64. The reduction is achieved applying following formula to each value, in each channel:
val newV = v / div * div + div / 2Since we do not care here about location of pixels or channels, each is processed the same way, we simply iterate over all values in the Mat object applying the same formula.
// We have an 8-bit grey lavel image (byte image) representead as `Mat`
val image : Mat = ...

// Total number of elements, combining components from each channel
val nbElements = image.rows * image.cols * image.channels

// Indexer is used to access value in the image
// Reshape to create flat view so we can iterate using a single loop
// Annotate type correct type of the indexer: UByteIndexer
val indexer: UByteIndexer = image.reshape(1, nbElements).createIndexer()

for (i <- 0 until nbElements) {
  // Convert to integer, byte is treated as an unsigned value
  val v = indexer.get(i)
  // Use integer division to reduce number of values
  val newV = v / div * div + div / 2
  // Put back into the image
  indexer.put(i, newV)
}
See example Ex2ColorReduce for details.
Here are the input image and the output image with reduced number of colors:

Frequently we want to modify pixel value depending on the values of its neighbors. One particular case of that is when the new value of a pixel is a linear combination of its neighbor values. This can be used to reduce noise, enhance appearance, or detect certain feature, for instance, edges.
The approach has two steps. First a kernel is constructed describing the linear combination of the neighborhood pixels. Then it is applied to neighborhood of each pixel in the image.
Here is a n example of sharpening an image using linear filtering:
// Read input image
val image = loadAndShowOrExit(new File("data/boldt.jpg"), IMREAD_COLOR)

// Define output image
val dest = new Mat()

// Construct sharpening kernel, oll unassigned values are 0
val kernel = new Mat(3, 3, CV_32F, new Scalar(0))
// Indexer is used to access value in the matrix
val ki = kernel.createIndexer().asInstanceOf[FloatIndexer]
ki.put(1, 1, 5)
ki.put(0, 1, -1)
ki.put(2, 1, -1)
ki.put(1, 0, -1)
ki.put(1, 2, -1)

// Filter the image
filter2D(image, dest, image.depth(), kernel)

// Display
show(dest, "Sharpened")
See example Ex3Sharpen for details.
Here are the input image and the sharpened output image:

Images can be combined in several ways to create new images. For instance they can be added, subtracted, multiplied, or divided. Details are covered in of the Cookbook. In this case JacaCV API calls are very similar to ones presented in the Cookbook.
Following example show the use of weighted addition:
// Read input images
val image1 = ...
val image2 = ...
// Define output image
val result = new Mat()
// Create blended image
addWeighted(image1, 0.7, image2, 0.9, 0.0, result)
// Display
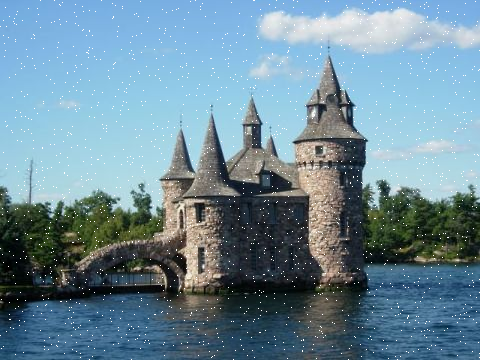
show(result, "Blended")See example Ex4BlendImages for details. The example illustrates creation of composite images. It adds simulated rain to an image.Here are the input images:

And the output composite image with simulated rain.

Processing can be applied only to a portion of an image also called Region of interest or ROI. The Cookbook discusses this process in more details.
Here is an example of modifying a small portion of an image. A watermark is added to a corner of the image. Blending of the watermark is controlled with a mask image.
// Read input image
val logo = loadAndShowOrExit(new File("data/logo.bmp"), IMREAD_COLOR)
val mask = loadOrExit(new File("data/logo.bmp"), IMREAD_GRAYSCALE)
val image = loadAndShowOrExit(new File("data/boldt.jpg"), IMREAD_COLOR)

// Define region of interest that matches the size of the logo
val imageROI = image(new Rect(image.cols - logo.cols, image.rows - logo.rows, logo.cols, logo.rows))

// Combine input image with the logo. Mask is used to control blending.
logo.copyTo(imageROI, mask)

// Display
show(image, "With Logo")
See example Ex5ROILogo for details.
Here the logo image added to the input images:
And the output composite image with a watermark.
