Home

Make sure you are attempting to connect and drive valid GPIO pins for your board.
To run the example pull down the code:
git clone [email protected]:Tpimp/QGpio.git
Open the project file in QtCreator or manually edit the source files and then rebuild the project.
Run the application from QtCreator or start it from command line (sudo privileges may be required).
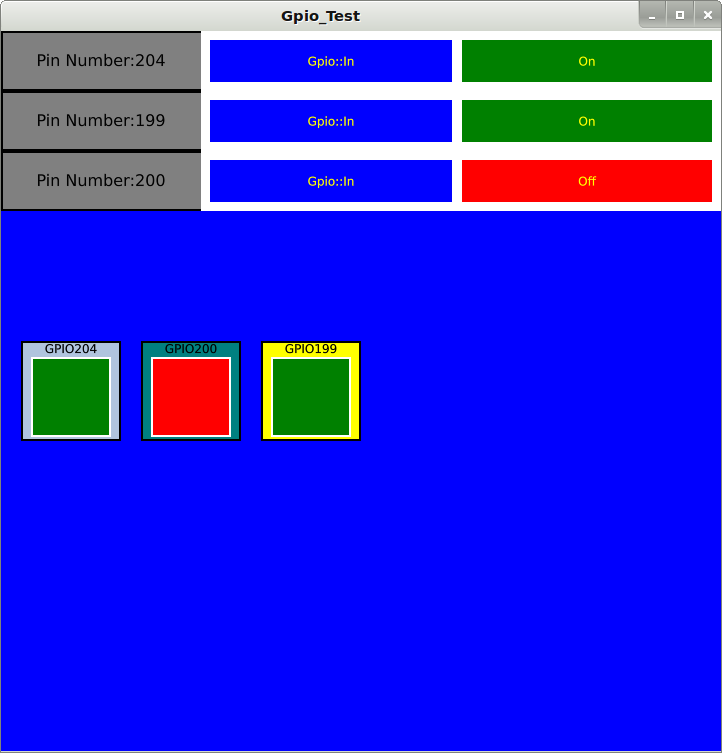 Keep in mind, the pins 199, 200, and 204 are specific to the Odroid-U3 I used for testing. Make sure to find the correct pin-out for your board and change the example to properly register the correct pins.
 qmake Gpio_Test.pro
 make
Run the application from QtCreator or start it from command line (sudo privileges may be required).
./Gpio_Test

QGpioWatcher spawns a separate thread to monitor the registered pins. You might not need QGpioWatcher, if you only use output pins. Also, instead you can monitor the pins manually through a pulling method, or a custom event system (not covered here). Ideally your system handles GPIO pins in as interrupts. If you do use QGpioWatcher bare in mind:
- QGpioWatcher::THREAD_SLEEP_TIME must be created and initialized (in main preferably)
-
#include "qgpiowatcher.h" #include "qgpio.h" ... // ~33.33 HZ sampling rate (30 milliseconds) int QGpioWatcher::THREAD_SLEEP_TIME = 30; .. int main(int argc, char*argv[]) ... - after being created, the watch thread must be started before pins can be registered
-
QGpioWatcher gpio_thread; gpio_thread.start(); - Because Qt Application Event systems may contain critical shutdown - QGpioWatcher objects must be terminated before exiting.
-
QObject::connect(&app, &QGuiApplication::aboutToQuit, &gpio_thread, &QThread::terminate); ... // before starting main event loop return app.exec(); - See the example application for more.
Because there are many gpio examples for sysfs (some even in C++), I will focus on the unique parts of QGpio.
The C++ side:
 //registering QGpio type
 qmlRegisterType<QGpio>("com.embedded.io",1,0,"QGpio");
In QML:
 QGpio{
     id:gpio200
     number:"200";
     onValueChanged: {
       //pin200.color = (new_value? "green":"red");
     }
     Component.onCompleted: {
       direction = QGpio.In;
       edge = QGpio.Both;
       active_low = false;
       GpioWatcher.watchGpioItem(gpio200);  // QGpioWatcher was imported to QML Context
       list.model = GpioWatcher.exportedObjects();
     }
   }
To find out more, check out Gpio_Test main.cpp.
I will continue improving GPIO integration. Next I plan to get PWM working, and if possible other software serial interfaces.