Create a folder and enter the folder
mkdir 'foldername' && cd 'foldername'Initialize npm
npm init -yInstall hardhat
npm install --save-dev hardhatCreate a Hardhat project
npx harhatPress enter on Create a
JavaScript project
$ npx hardhat
888    888                      888 888               888
888    888                      888 888               888
888    888                      888 888               888
8888888888  8888b.  888d888 .d88888 88888b.   8888b.  888888
888    888     "88b 888P"  d88" 888 888 "88b     "88b 888
888    888 .d888888 888    888  888 888  888 .d888888 888
888    888 888  888 888    Y88b 888 888  888 888  888 Y88b.
888    888 "Y888888 888     "Y88888 888  888 "Y888888  "Y888

Welcome to Hardhat v{HARDHAT_VERSION}

? What do you want to do? …
▸ Create a JavaScript project
  Create a TypeScript project
  Create an empty hardhat.config.js
  Quit
Important
Make sure you install the hardhat toolbox by runningnpm install --save-dev @nomicfoundation/hardhat-toolbox
If the process is successful, you will see the text Project created
Install
dotenvto make use of environment variables
npm i dotenv
Create a
.envfile in your root folder and place your private key
PRIVATE_KEY="......."Open the hardhat.config.js file

Setup the Swisstronik's network
require("@nomicfoundation/hardhat-toolbox");
require("dotenv").config({ path: ".env" });

const { PRIVATE_KEY } = process.env;

/** @type import('hardhat/config').HardhatUserConfig */
module.exports = {
  solidity: "0.8.19",
  networks: {
    swisstronik: {
      url: "https://json-rpc.testnet.swisstronik.com/", //URL of the RPC node for Swisstronik.
      accounts: [`0x${PRIVATE_KEY}`], //Your private key starting with "0x"
      //Make sure you have enough funds in this wallet to deploy the smart contract
    },
  },
};
Make sure you have enough funds in this wallet to deploy/interact with the smart contract. otherwise, you can get SWTR test tokens here
Go to the contracts folder and create the
Hello_swtr.solfile (smart contract).

Paste the smart contract into your
Hello_swtr.solfile.
Currently, only solidity compilers up to 0.8.19 is supported
// SPDX-License-Identifier: UNLICENSED
pragma solidity ^0.8.19;

//This contract is only intended for testing purposes

contract Swisstronik {
    string private message;

    /**
     * @dev Constructor is used to set the initial message for the contract
     * @param _message the message to associate with the message variable.
     */
    constructor(string memory _message) payable{
        message = _message;
    }

    /**
     * @dev setMessage() updates the stored message in the contract
     * @param _message the new message to replace the existing one
     */
    function setMessage(string memory _message) public {
        message = _message;
    }

    /**
     * @dev getMessage() retrieves the currently stored message in the contract
     * @return The message associated with the contract
     */
    function getMessage() public view returns(string memory){
        return message;
    }
}
Compile the contract
npx hardhat compileAfter successful compilation:
- You should get the message Compiled 1 Solidity file successfully in your terminal
- new artifacts folder should be created
Now you are ready to deploy this contract on Swisstronik! 🚀
Go to the deploy.js file located in the
scriptsfolder and paste the deployment script in thedeploy.jsfile
const hre = require("hardhat");

async function main() {
  /**
   * @dev make sure the first argument has the same name as your contract in the Hello_swtr.sol file
   * @dev the second argument must be the message we want to set in the contract during the deployment process
   */
  const contract = await hre.ethers.deployContract("Swisstronik", ["Hello Swisstronik!!"]);

  await contract.waitForDeployment();

  console.log(`Swisstronik contract deployed to ${contract.target}`);
}

//DEFAULT BY HARDHAT:
// We recommend this pattern to be able to use async/await everywhere
// and properly handle errors.
main().catch((error) => {
  console.error(error);
  process.exitCode = 1;
});
Deploy the contract by running
npx hardhat run scripts/deploy.js --network swisstronikAfter successful deployment, you should receive the following message in your terminal:
Swisstronik contract deployed to 0x...
Awesome, now let's start interacting with the contract! 🎉
Install SwisstronikJS
npm i @swisstronik/swisstronik.js
Within the scripts folder, create a file called
setMessage.js

Let's write our setMessage.js script
const hre = require("hardhat");
const { encryptDataField, decryptNodeResponse } = require("@swisstronik/swisstronik.js");

const sendShieldedTransaction = async (signer, destination, data, value) => {
  const rpclink = hre.network.config.url;
  const [encryptedData] = await encryptDataField(rpclink, data);
  return await signer.sendTransaction({
    from: signer.address,
    to: destination,
    data: encryptedData,
    value,
  });
};

async function main() {
  const contractAddress = "0xf84Df872D385997aBc28E3f07A2E3cd707c9698a";
  const [signer] = await hre.ethers.getSigners();
  const contractFactory = await hre.ethers.getContractFactory("Swisstronik");
  const contract = contractFactory.attach(contractAddress);
  const functionName = "setMessage";
  const messageToSet = "Hello Swisstronik!!";
  const setMessageTx = await sendShieldedTransaction(signer, contractAddress, contract.interface.encodeFunctionData(functionName, [messageToSet]), 0);
  await setMessageTx.wait();
  console.log("Transaction Receipt: ", setMessageTx);
}

main().catch((error) => {
  console.error(error);
  process.exitCode = 1;
});
Execute the following command in your terminal to run the script using the Swisstronik network
npx hardhat run scripts/setMessage.js --network swisstronik
Upon successful execution, your terminal should display Transaction Receipt: TransactionResponse {...} , now it's time to retrieve this message🎉
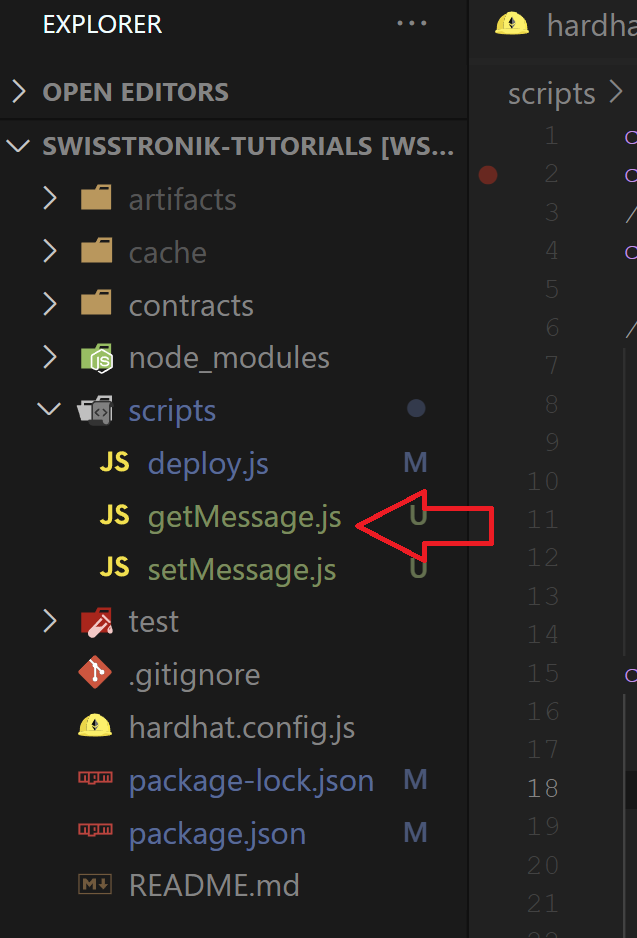
Within the scripts folder, create a file called getMessage.js
Let's write our getMessage.js script
const hre = require("hardhat");
const { encryptDataField, decryptNodeResponse } = require("@swisstronik/swisstronik.js");

const sendShieldedQuery = async (provider, destination, data) => {
  const rpclink = hre.network.config.url;
  const [encryptedData, usedEncryptedKey] = await encryptDataField(rpclink, data);
  const response = await provider.call({
    to: destination,
    data: encryptedData,
  });
  return await decryptNodeResponse(rpclink, response, usedEncryptedKey);
};

async function main() {
  const contractAddress = "0xf84Df872D385997aBc28E3f07A2E3cd707c9698a";
  const [signer] = await hre.ethers.getSigners();
  const contractFactory = await hre.ethers.getContractFactory("Swisstronik");
  const contract = contractFactory.attach(contractAddress);
  const functionName = "getMessage";
  const responseMessage = await sendShieldedQuery(signer.provider, contractAddress, contract.interface.encodeFunctionData(functionName));
  console.log("Decoded response:", contract.interface.decodeFunctionResult(functionName, responseMessage)[0]);
}

main().catch((error) => {
  console.error(error);
  process.exitCode = 1;
});
Execute the following command in your terminal to run the script using the Swisstronik network
npx hardhat run scripts/getMessage.js --network swisstronik
Upon successful execution, your terminal should display Decoded response: Hello Swisstronik!! or the latest message you've defined in the contract 🎉🙌🙌