This is a fully 3D printed clock that was designed in Fusion 360. The project is based on Ivan Miranda's Big Digital Clock and was completely re-designed.
All files and photos can be found at: Thingiverse
- Responsive userinterface

- Create alarms

- Show current temperature in your region

-
Display local time
-
Set individual colors of each digit
-
Custom scoreboard mode
-
Control brightness
-
Save custom colors
- 1x Raspberry Pi
- 1x Wemos d1 mini
- 1x 1m of WS2812 LED strip with 60 LED's
- 1x Power supply 5V, 4A
- 16x M3 * 10-16mm
- 16x M3 Nuts
- 1x Power jack adapter
- 2m Wire
- 4x Dupont connectors
- Soldering iron
- 3D Printer
- Pliers
- Hot glue gun
| Part | frame | dot_frame | back_cover | dot_back_cover | diffuser | dot_diffuser |
|---|---|---|---|---|---|---|
| Speed | 45mm/s | 45mm/s | 45mm/s | 45mm/s | 25mm/s | 25mm/s |
| Infill | 15% | 15% | 15% | 15% | 100% | 100% |
| Layer | 0.2mm | 0.2mm | 0.2mm | 0.2mm | 0.2mm | 0.2mm |
| Color | Black | Black | Black | Black | White | White |
| Amount | 4 | 1 | 4 | 1 | 28 | 2 |
First the LED strips have to be cut into pieces of 2 LEDs each, then the ends have to be bent until the solder pads are exposed. It is recommended to tape the strips onto a soldering mat or a table and solder the wires afterwards.
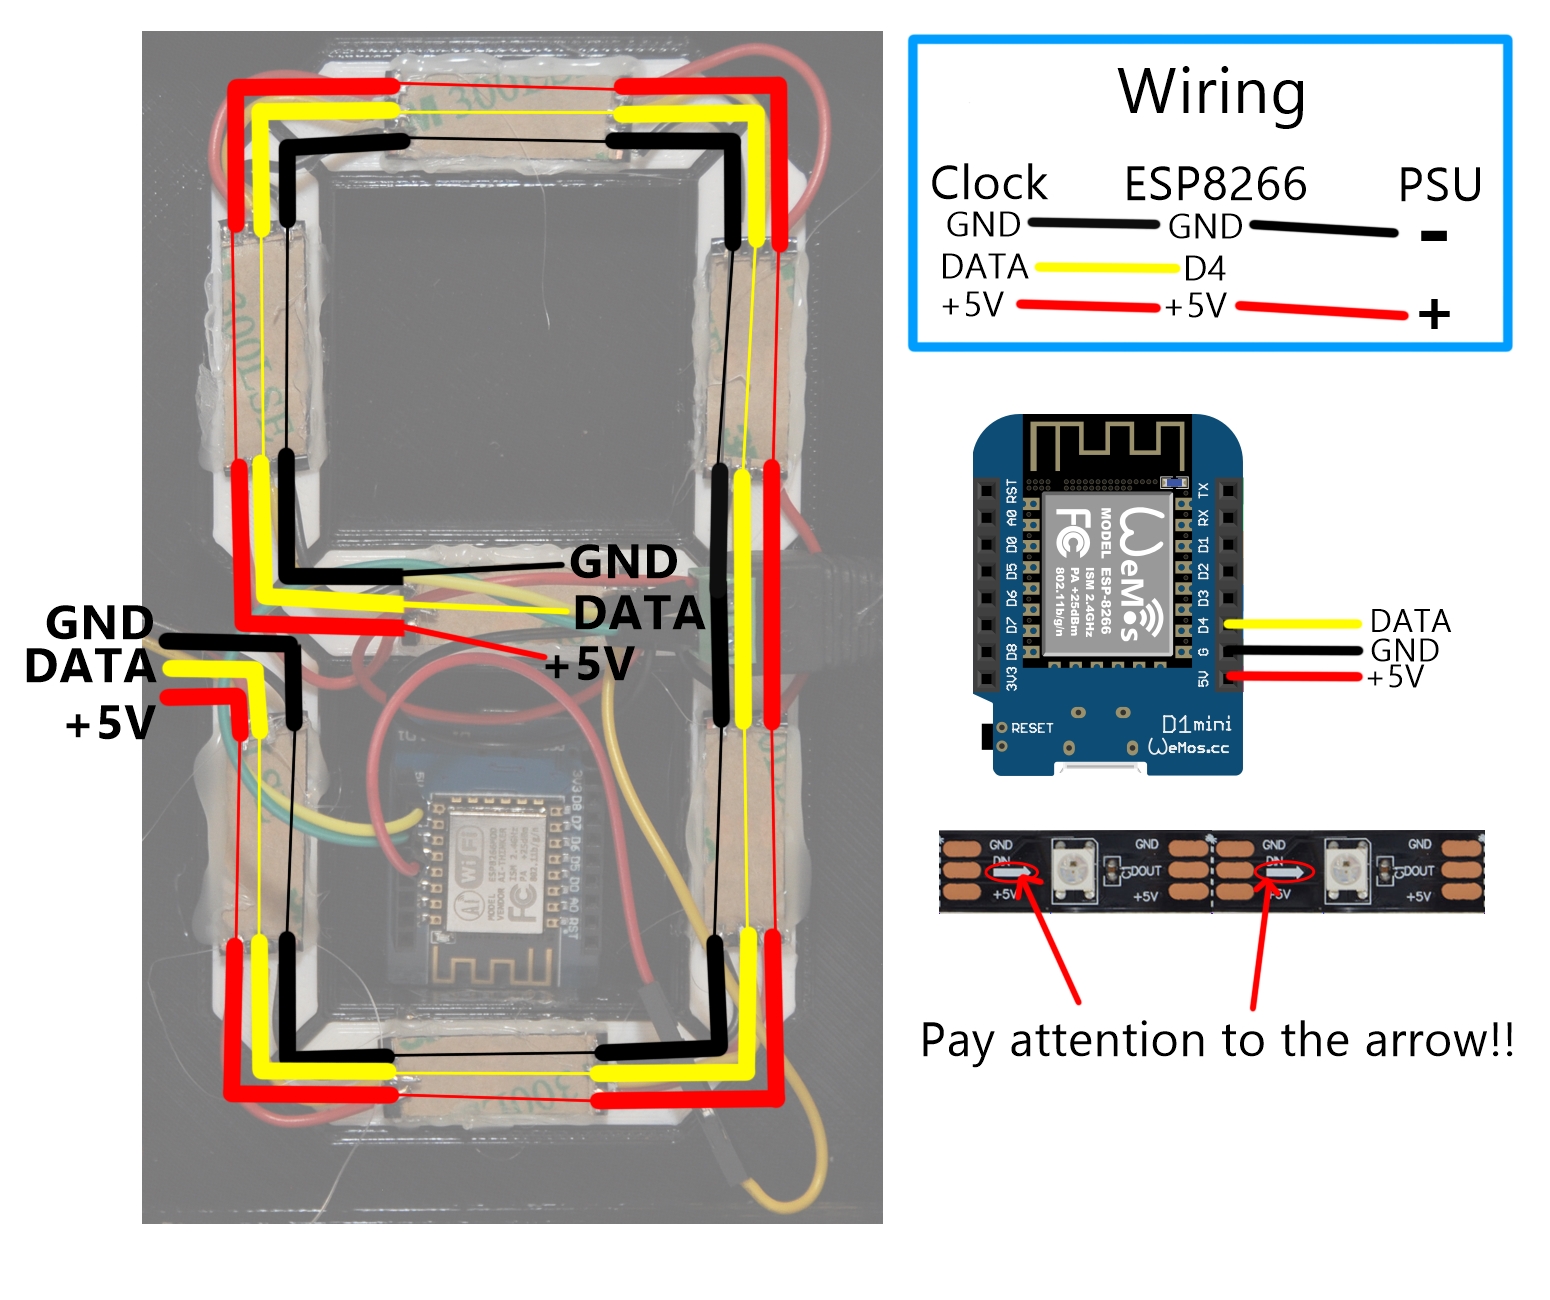

Be careful when wiring the dots, only one LED was used for these pieces.
Upload the clock_mqtt.ino sketch onto the ESP8266, if the leds don't show 0:0:0:1 after one minute, then you made a mistake or have loose wires somewhere.
Push in all 30 diffusers, use the 16 M3 screws and nuts to assemble the frame. This step should be self explainatory.
A hot glue gun needs to be used to glue on all LED strips. The start of the LED strip and the ESP8266 must be located on the left when looking at the clock from the front. Afterwards also glue on the microcontroller and the power jack once everything works the way it should. Finally attach the back covers.
In case help with Raspberry Pi is needed, click here.
bash <(curl -sL https://raw.githubusercontent.com/node-red/raspbian-deb-package/master/resources/update-nodejs-and-nodered)
sudo apt-get install nodejs npm -y
cd $HOME/.node-red
npm install node-red-dashboard
- if you get an error try:
npm install --unsafe-perm node-red-dashboard
npm install node-red-node-openweathermap
npm install node-red-node-mysql
sudo apt-get install mosquitto -y
(optional) Setup mosquitto authentication
sudo apt-get install mysql-server -y
- Just hit OK or RETURN during installation
- (recommended) Setup a static ip on your router
- or on your Raspberry Pi
You will have to create a database named clock to be able to save alarms. Just type into your shell:
mysql -uroot
create database clock;
CREATE USER 'admin'@'localhost' IDENTIFIED BY 'raspberry';
GRANT ALL PRIVILEGES ON clock.* TO 'admin'@'localhost';
FLUSH PRIVILEGES;
quit
sudo node-red-start
- Click on the 3 dashes in the top right corner → import → clipboard
- Enter the code snippet from all_flows.txt and click import
- Set topic to clock
- Edit broker and enter localhost in the IP field
- If you had set up authentication before, the credentials must be entered in the Security tab
- Edit the mysql connection
- IP: 127.0.0.1
- Username: admin
- Password: raspberry
- Database: clock

- Enter the offset of the time, Germany and Austria would be = 1
- If temperature output is not needed, just delete the flow Thingiverse_weather and the weather section in the Thingiverse_clock flow.
- Head over to OpenWeatherMap and create an account
- Click on API-Keys and copy the value
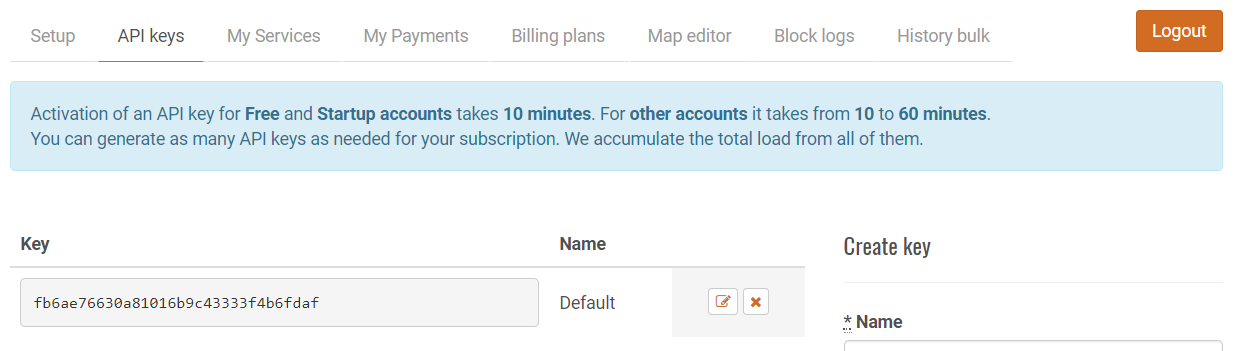
- Afterwards copy that key into the openweathermap node in the Thingiverse_weather flow.
- Either pick geo-coordinates or city to get the temperatures.

- Hit DEPLOY
- Now you can connect to the UI via: http://yourRaspberryIP:1880/ui
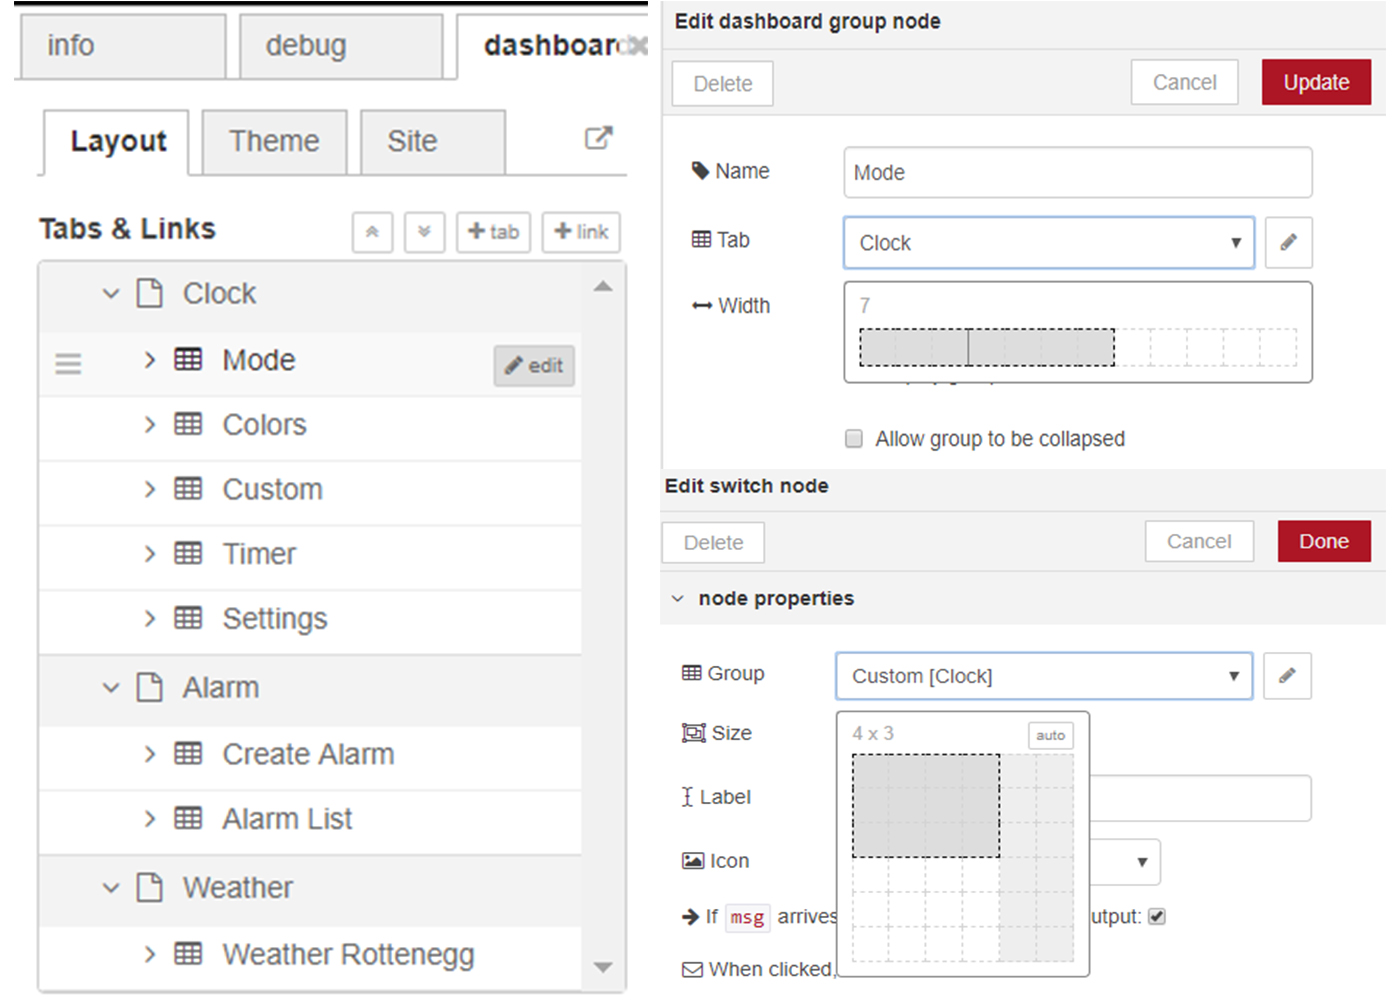
- The webinterface is designed to fit the whole screen of the Fire HD 8 Tablet, to fit your phone you have to change the dimensions of the elements.
- You can change the position by dragging the elements in the dashboard list.
- You should also change the name of the Weather Rottenegg tab.
- You can either choose one of the two default themes or set your own colors.

- Click on preferences
- Enter under Additional Board Manager URLs: http://arduino.esp8266.com/stable/package_esp8266com_index.json
- Now head to tools → Board → Boards-Manager
- Search for esp8266 and install the package
- Select WeMos D1 R2 & mini from the boards list
- Click on sketch → include libary → manage labraries
- Install PubSubClient
- Install Adafruit Neopixel
- Set your WiFi SSID and WiFi password
- Set mqtt_server to your Raspberry Pi's IP-Address
- If you had set up authentication before, change mqtt_auth to 1 and enter your credentials below, otherwise set it to 0
